Welcome to NETO

Log in to your account, or sign up in a minute.

Already registered?Existing clients
New here? Sign upChoose your track Employer Employee / Freelancer

Get in touch

Pick whatever works for you · we're here.

Info & policies

Everything about NETO · transparent and available

NETO · Bareket I.T. Ltd.
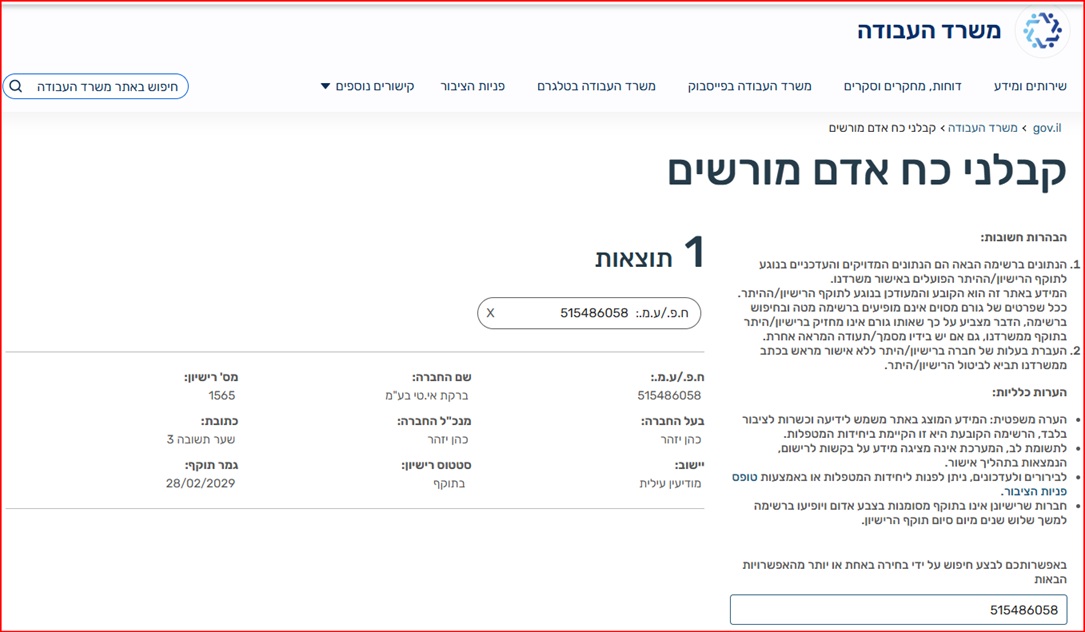
Reg. 515486058 · Licensed manpower contractor #1565
Office: Sha'arei Teshuva 31, Modi'in Illit
Tel +972-8-976-1874 · neto@neto.work

Open →

Book a demo

Pick a convenient time · we'll confirm by phone/email

Choose a day
Choose a time (11:30–15:30)
Guide progress0%
Employer Guide

Invite a worker or freelancer and pay through NETO

A visual, step-by-step guide from employer registration through invitation, invoicing and salary transfer.

AI summary · the guide in 30 seconds
  • What you do here: register as an employer on NETO.LIVE and send an invitation to a worker or freelancer · NETO handles the rest: payslip, taxes and salary transfer.
  • Three tracks: permanent employee · temporary worker · freelancer invoice request.
  • What to prepare: business details (name, company/business number, address) and the worker's details (name, phone, email).
  • How long it takes: registration and the first invitation · about 10 minutes.
  • No bureaucracy: no company or withholding file needed · NETO operates under manpower licence 1565.

Prefer to watch it? A minute and a half and it's clear

A narrated English video walking through every step of this guide · from registration to payment.

1
Step 1 of 11

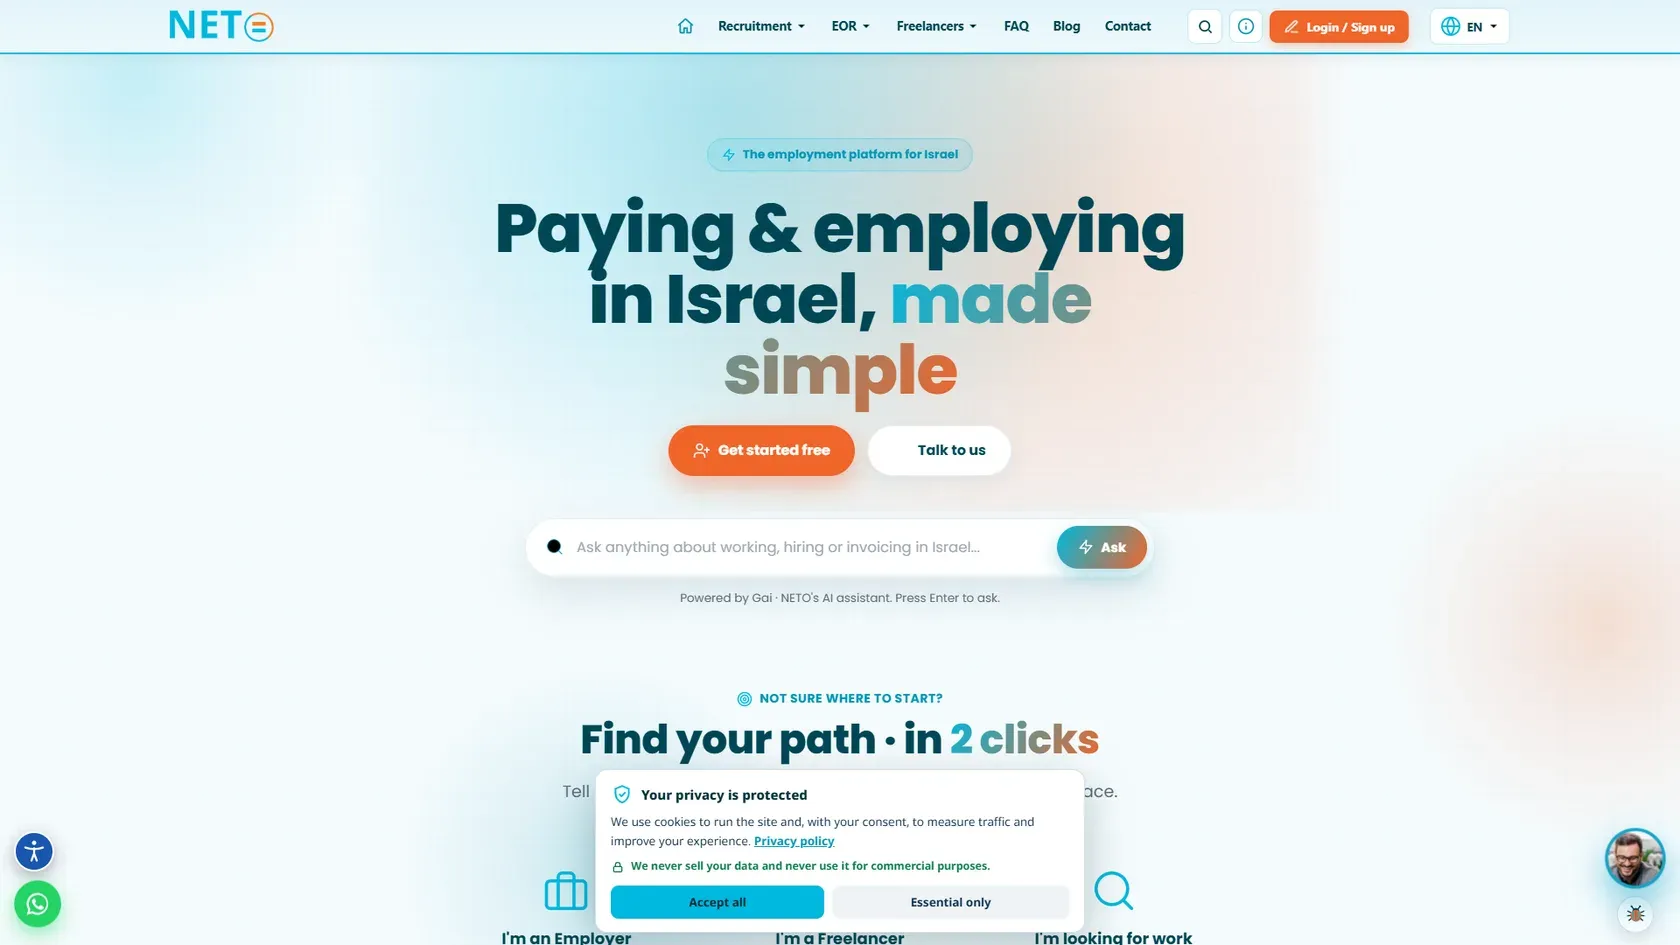
Enter the NETO system

On the NETO website, click the orange “Login / Sign up” button at the top of the screen.

Important: An existing employer can log in. A new employer should continue to registration.
Enter the NETO system
2
Step 2 of 11

Choose the employer track

In the window that opens, choose Employer.
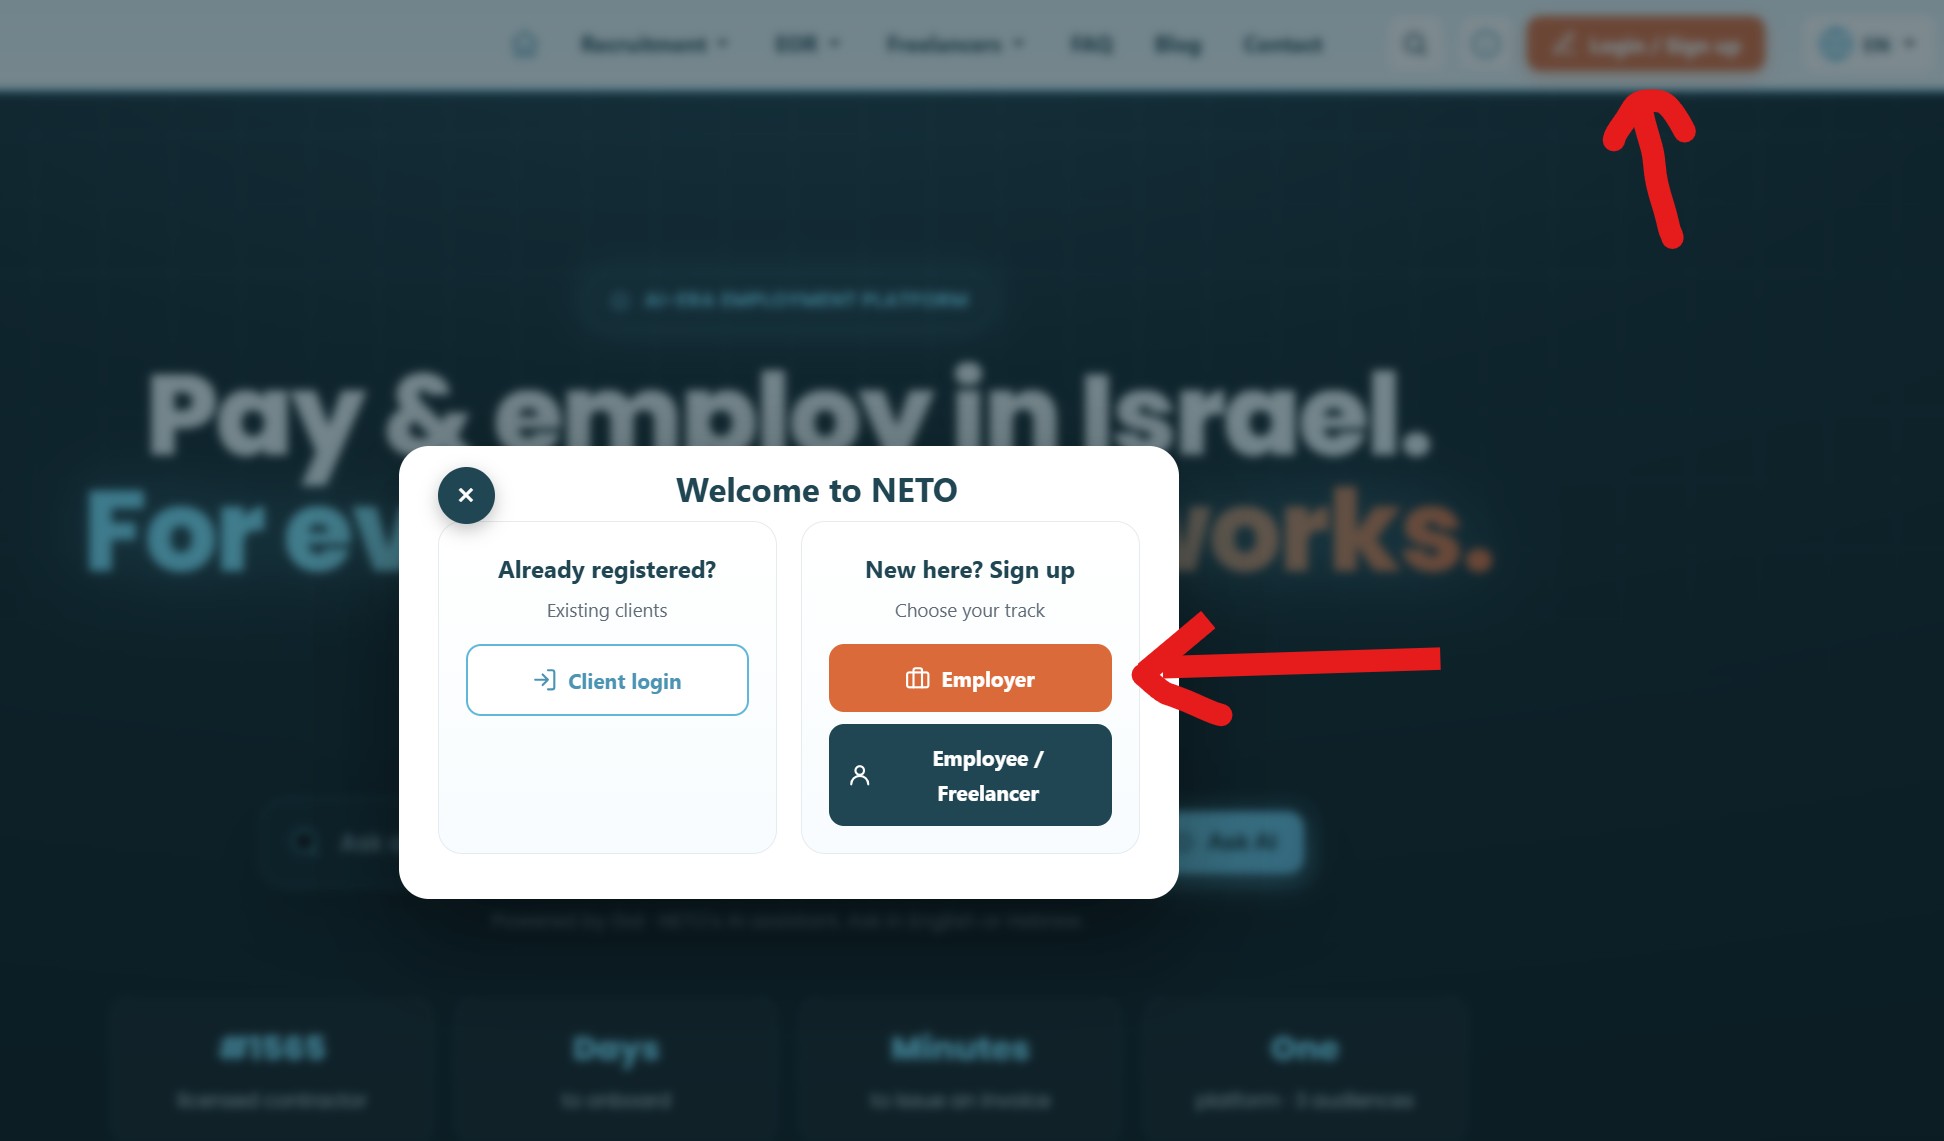
Important: The Employee / Freelancer track is for a worker or freelancer registering independently.
Choose the employer track
3
Step 3 of 11

Employer registration

Enter the full name, email, phone number and password. Accept the terms and click Continue.
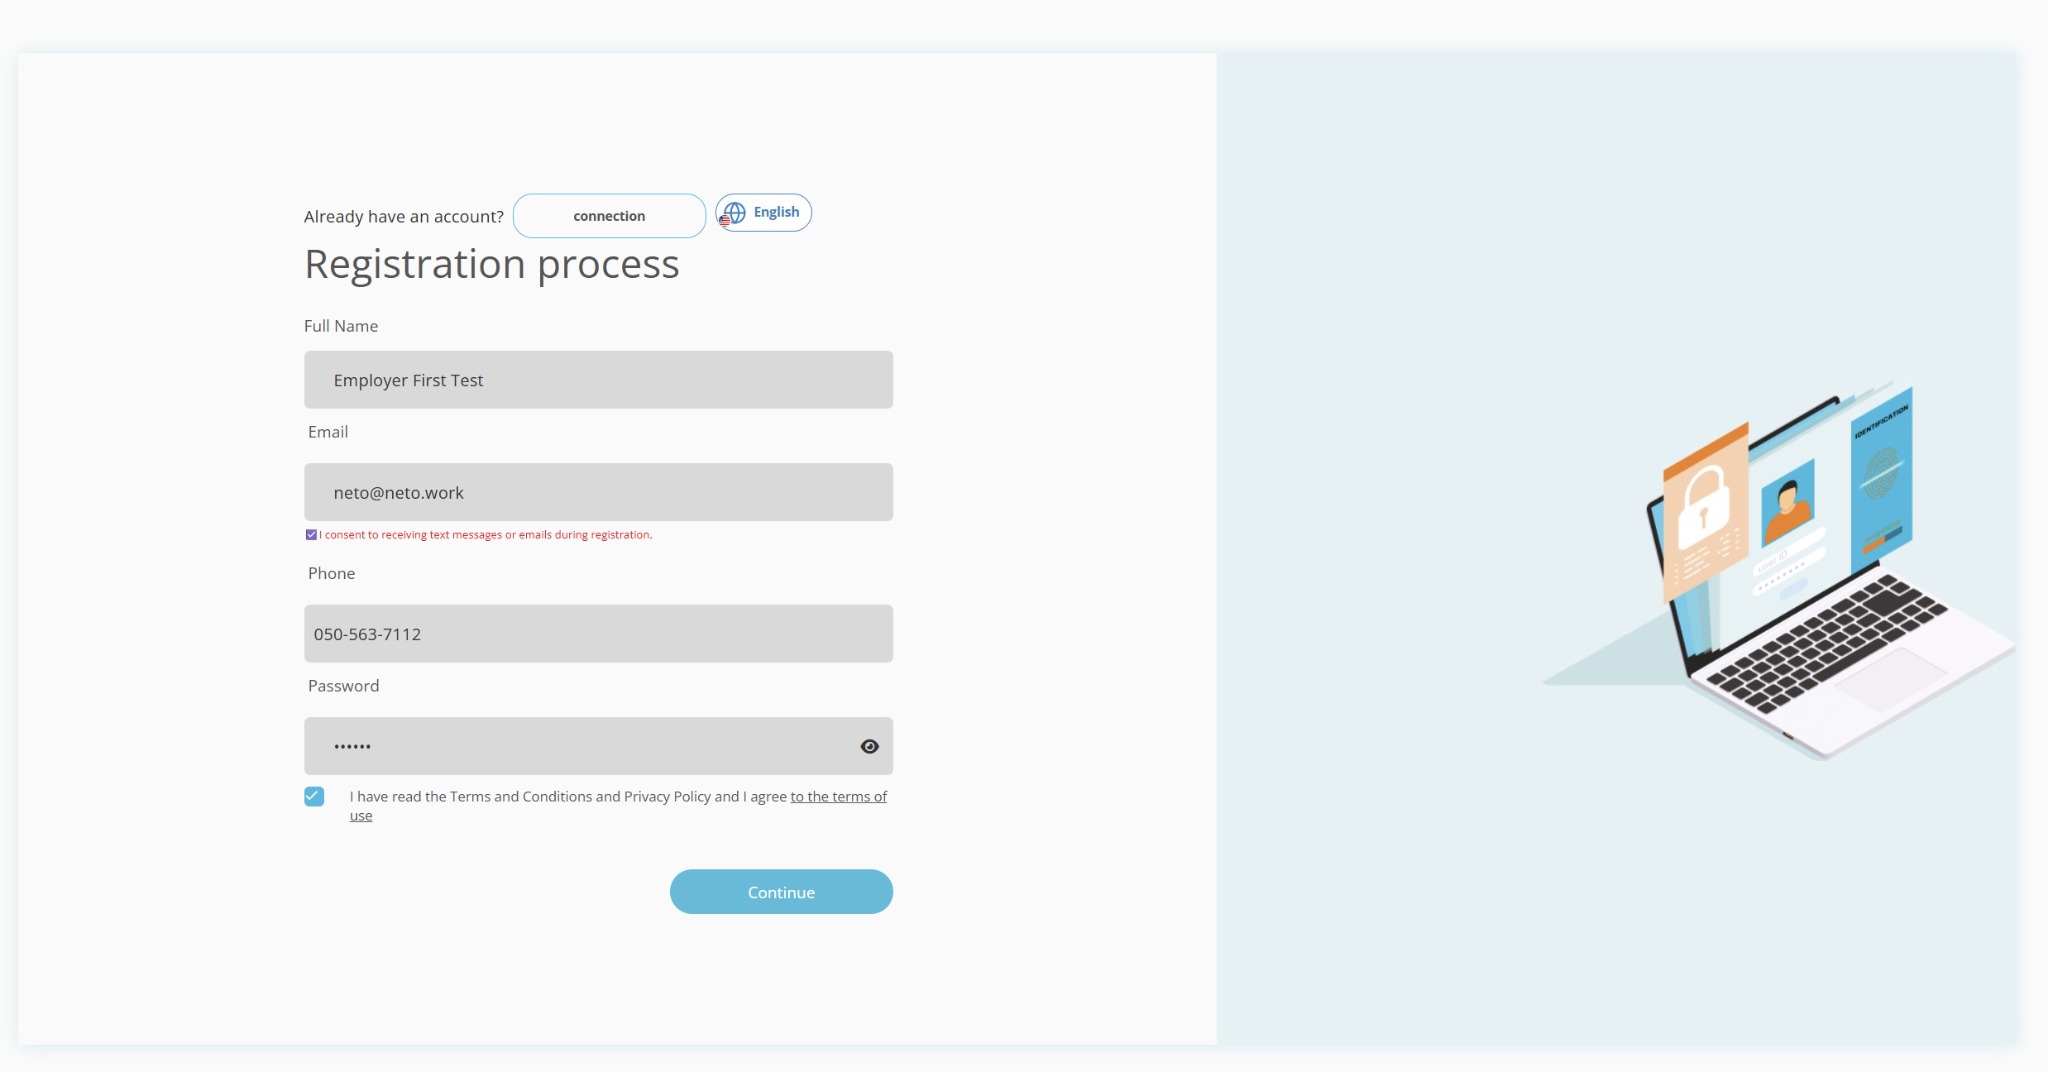
Important: Use an active email address and phone number because the verification code will be sent to them.
Employer registration
4
Step 4 of 11

Verify the registration details

The system sends a verification code to the phone and email. Enter the code and click OK.
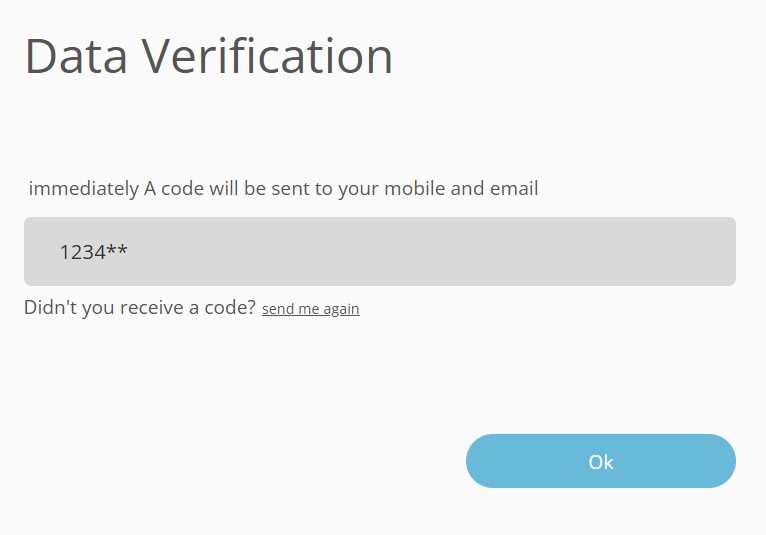
Important: If the code was not received, click “Send again”.
Verify the registration details
5
Step 5 of 11

Complete the business details

Enter the business name, company or business number, email, phone, address and contact person. Then add the profile details that will be shown to workers.
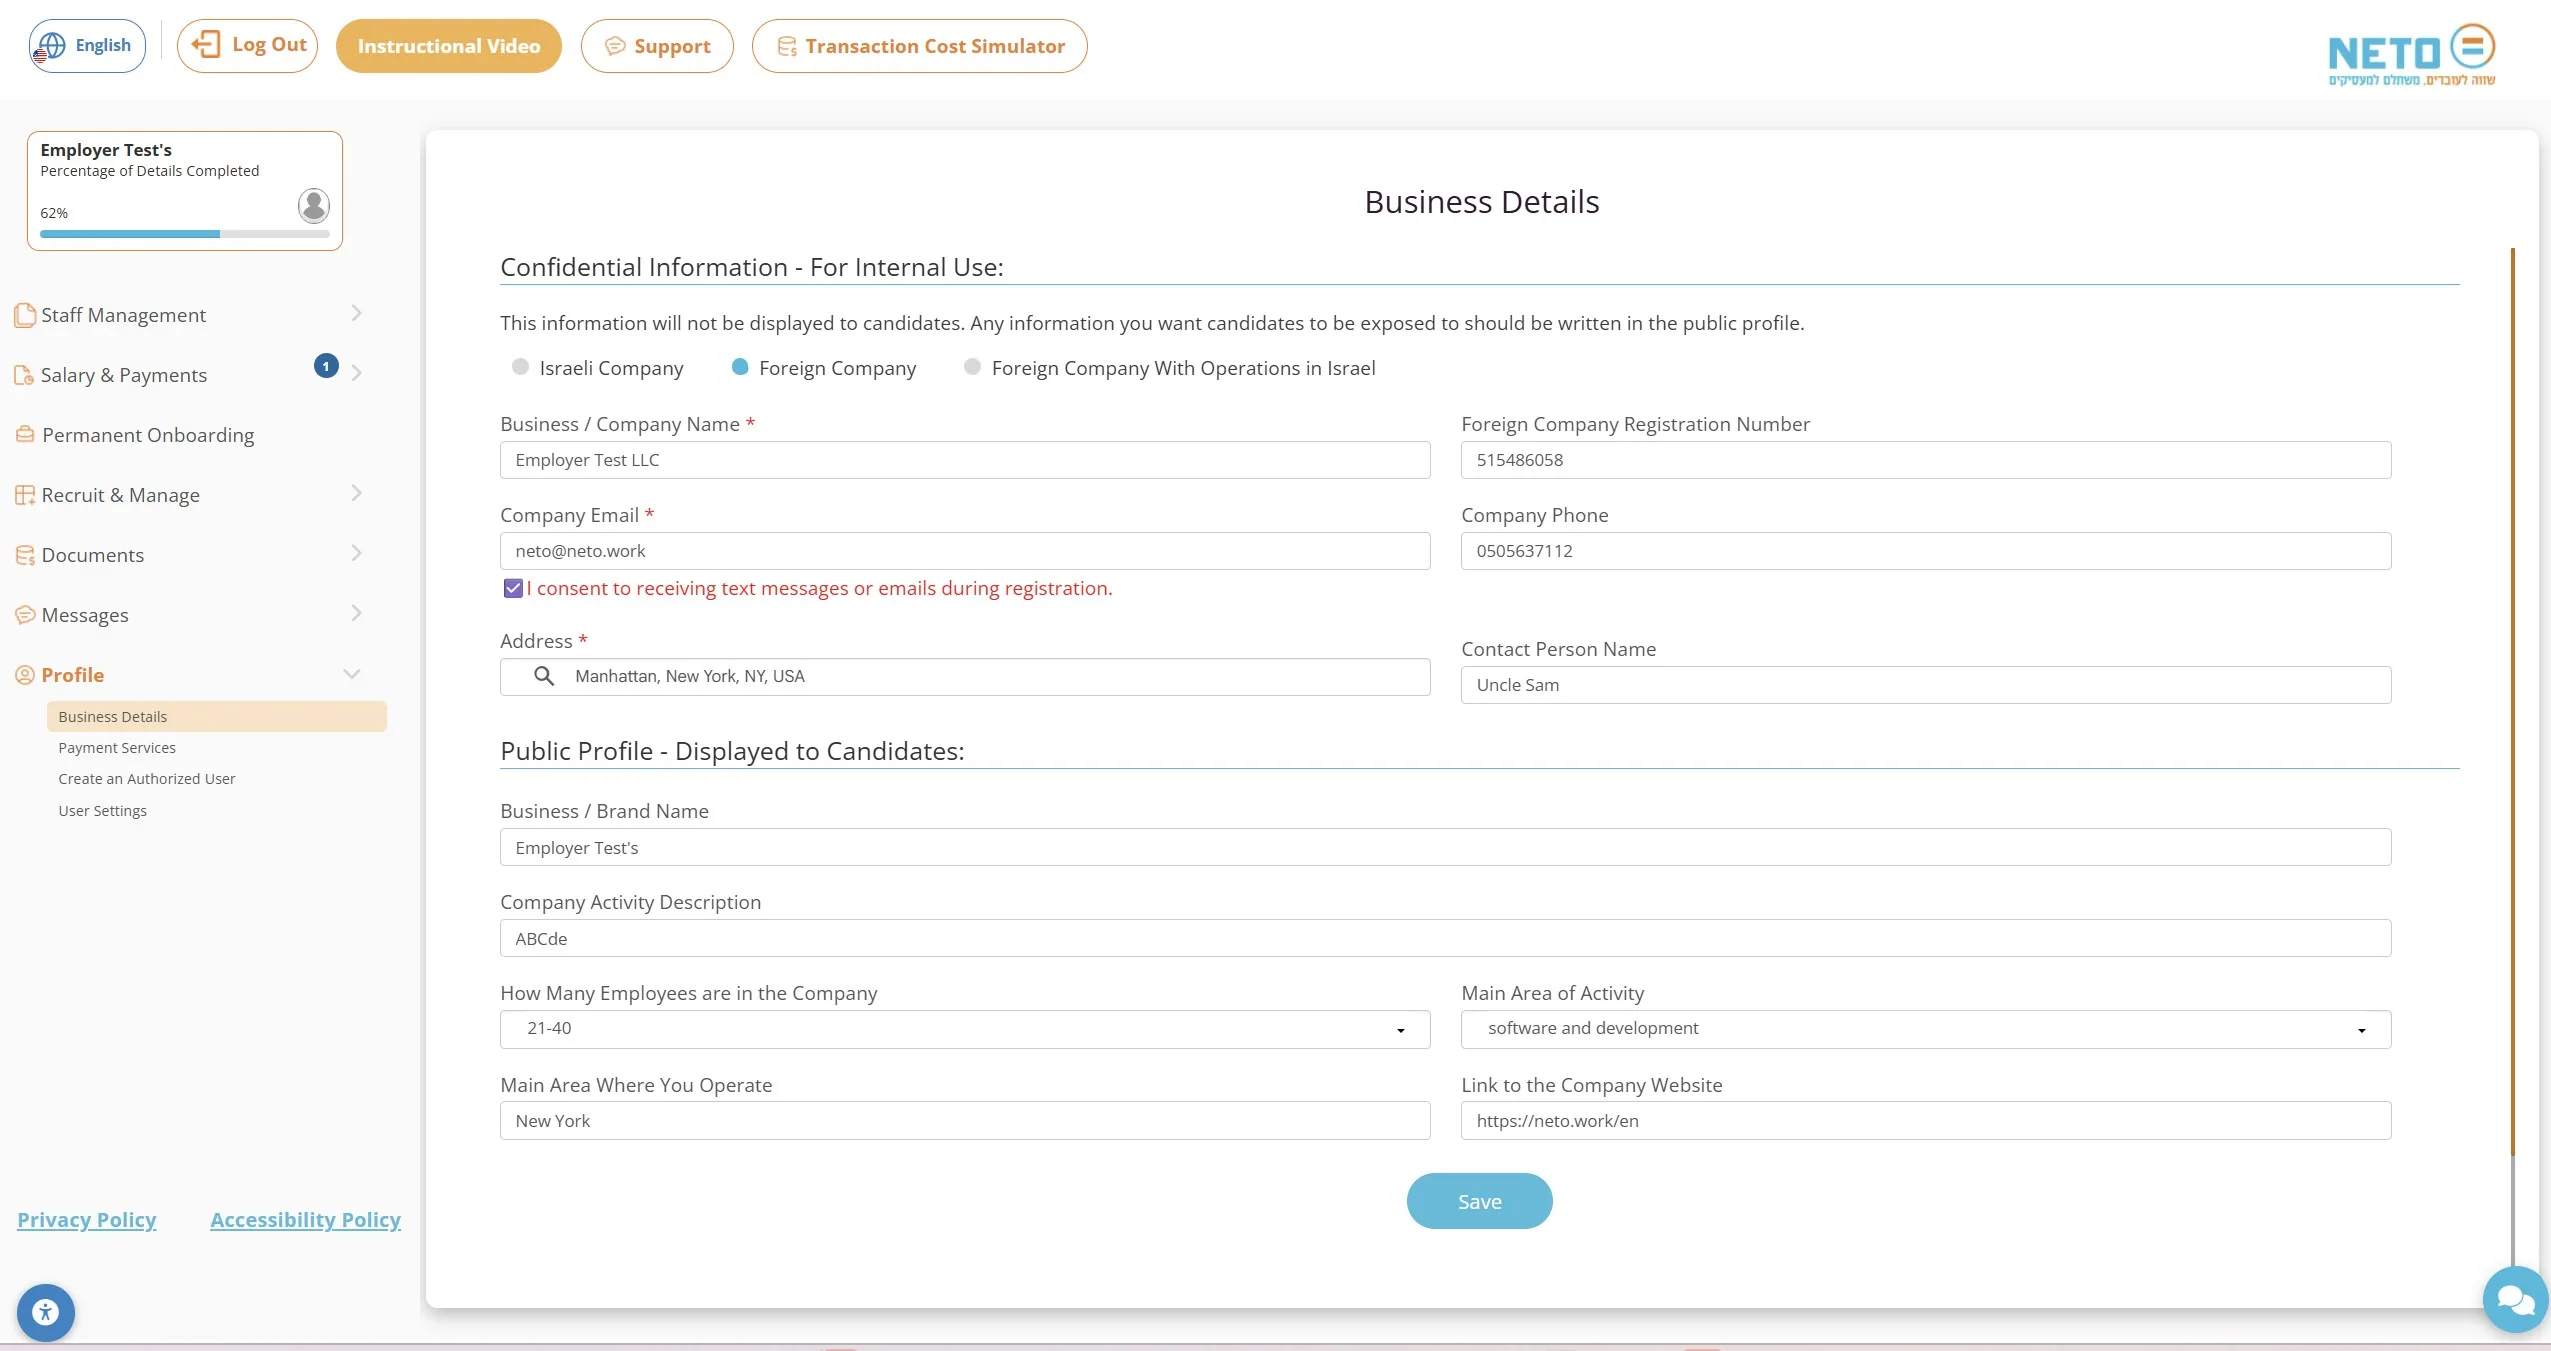
Important: Click Save when finished. The details can later be updated from the Profile area.
Complete the business details
6
Step 6 of 11

Business details saved

After saving, a success message appears. Close it and continue to the main screen.
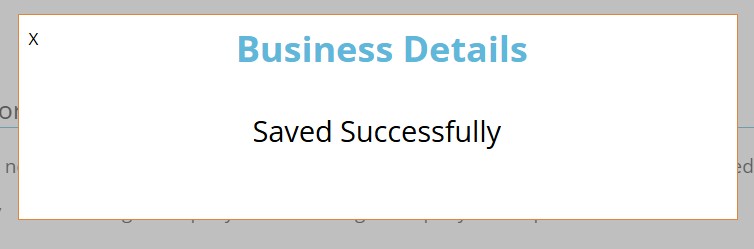
Important: If the message does not appear, check whether a required field is missing.
Business details saved
7
Step 7 of 11

Choose the employment or payment type

Open Salary & Payments. Choose the relevant track: permanent employee, temporary worker or request a freelancer invoice.
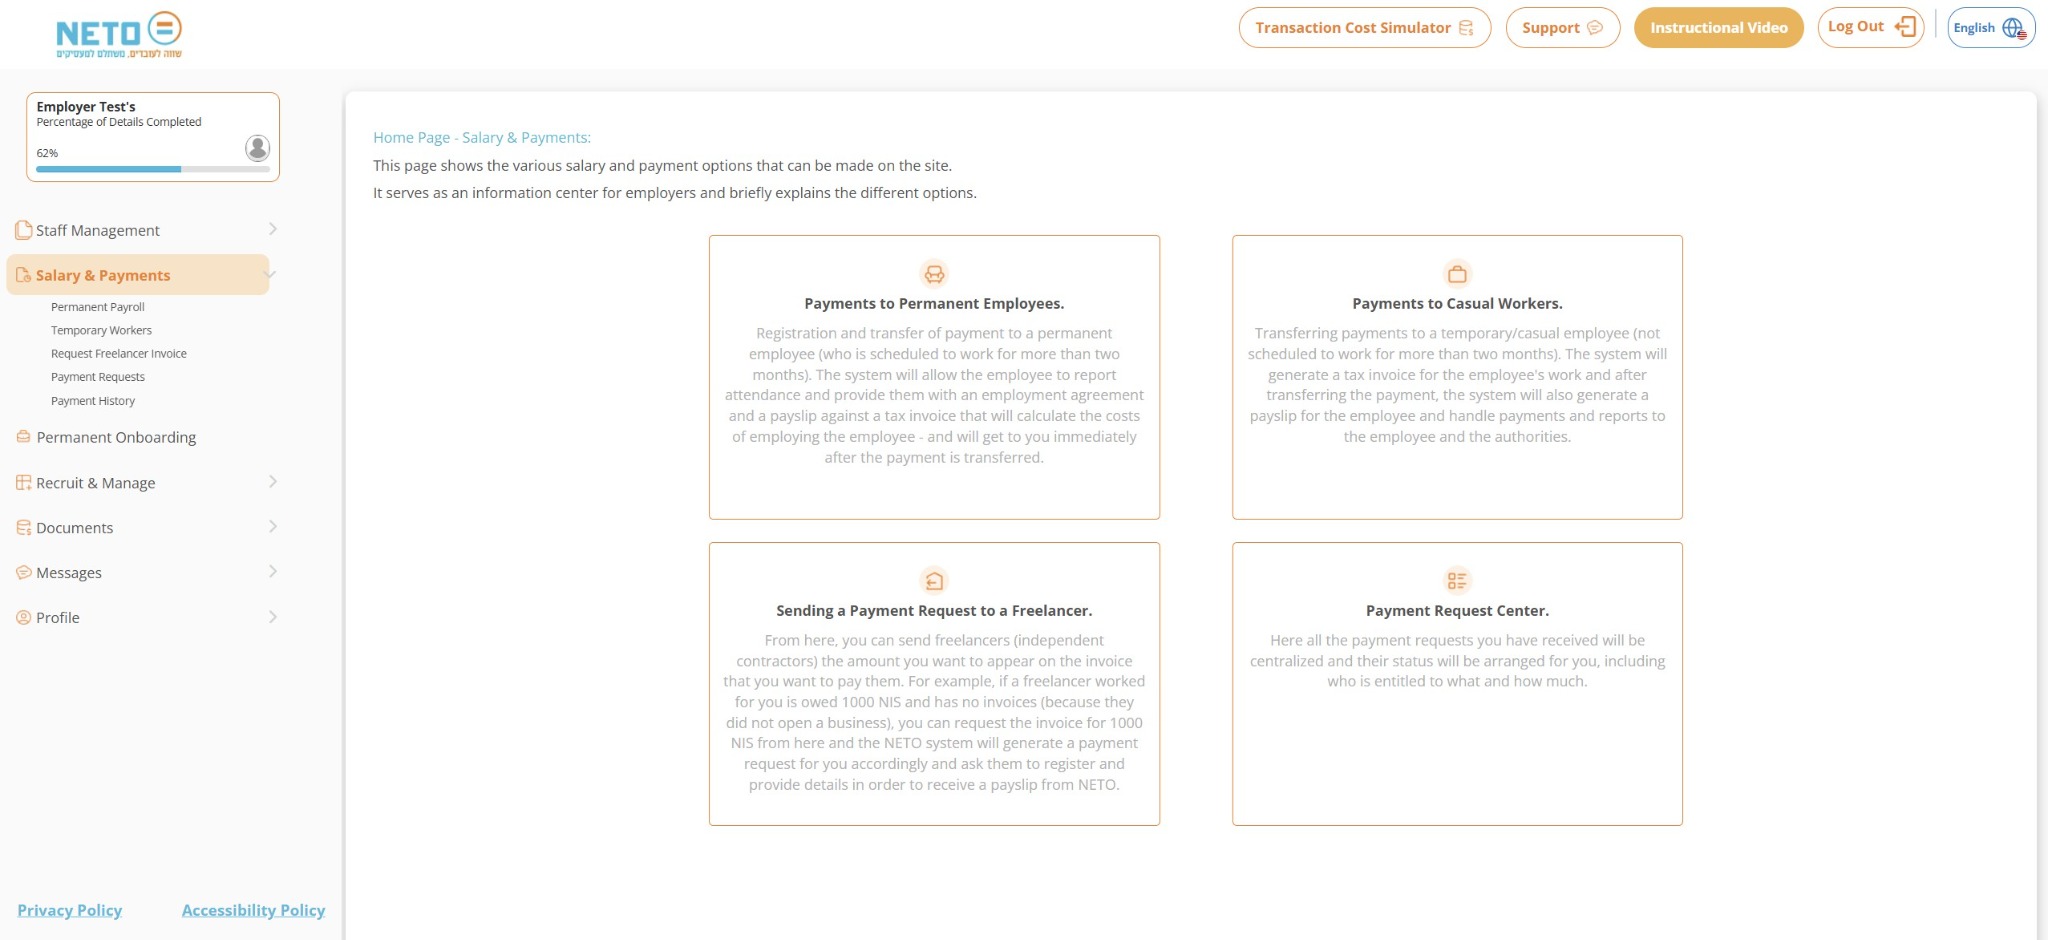
Important: To request payment from a freelancer without a registered business, choose “Request Freelancer Invoice”.
Choose the employment or payment type
8
Step 8 of 11

Create a freelancer payment request

Click “Request Freelancer Invoice” or open the Payment Request Center, depending on the required action.
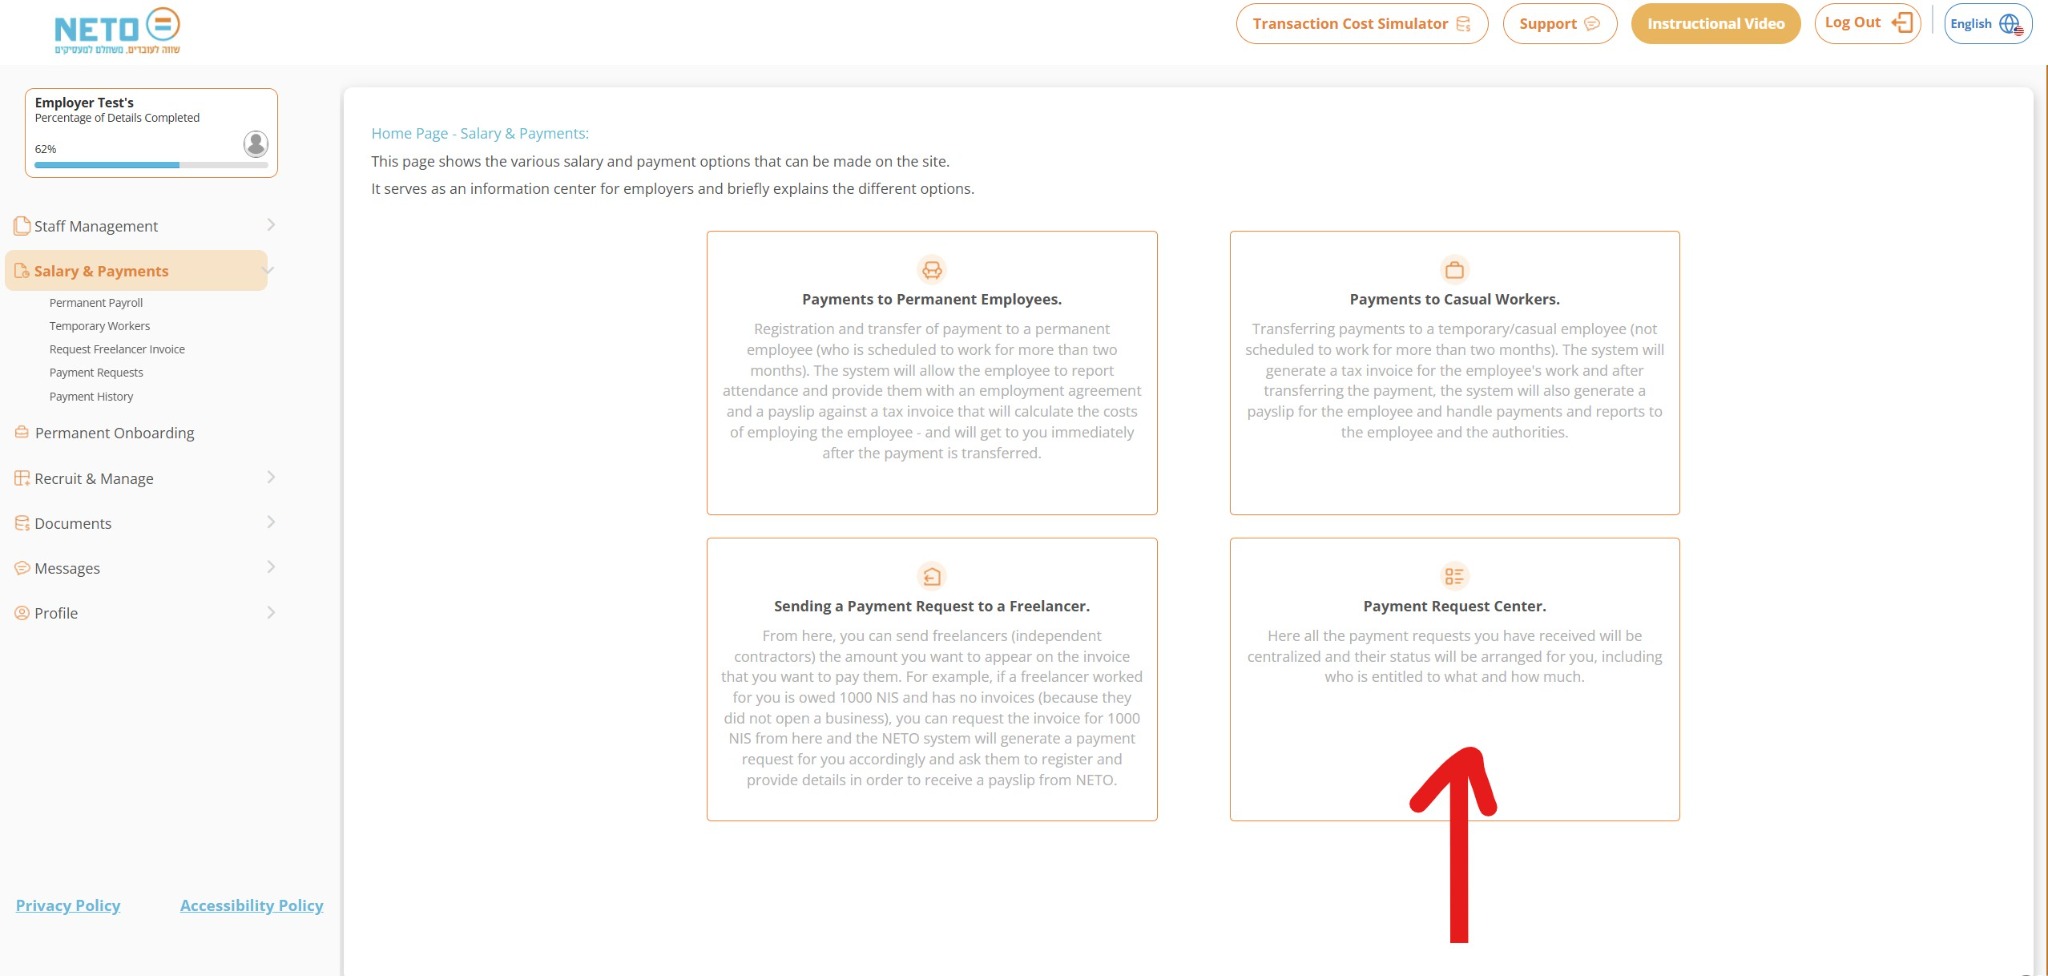
Important: A new request sends an invitation. The Payment Request Center is used to monitor and manage existing requests.
Create a freelancer payment request
9
Step 9 of 11

Enter the worker or freelancer details

Enter the name, phone number, email and a short work description. If the worker already exists in the system, select them from the list.
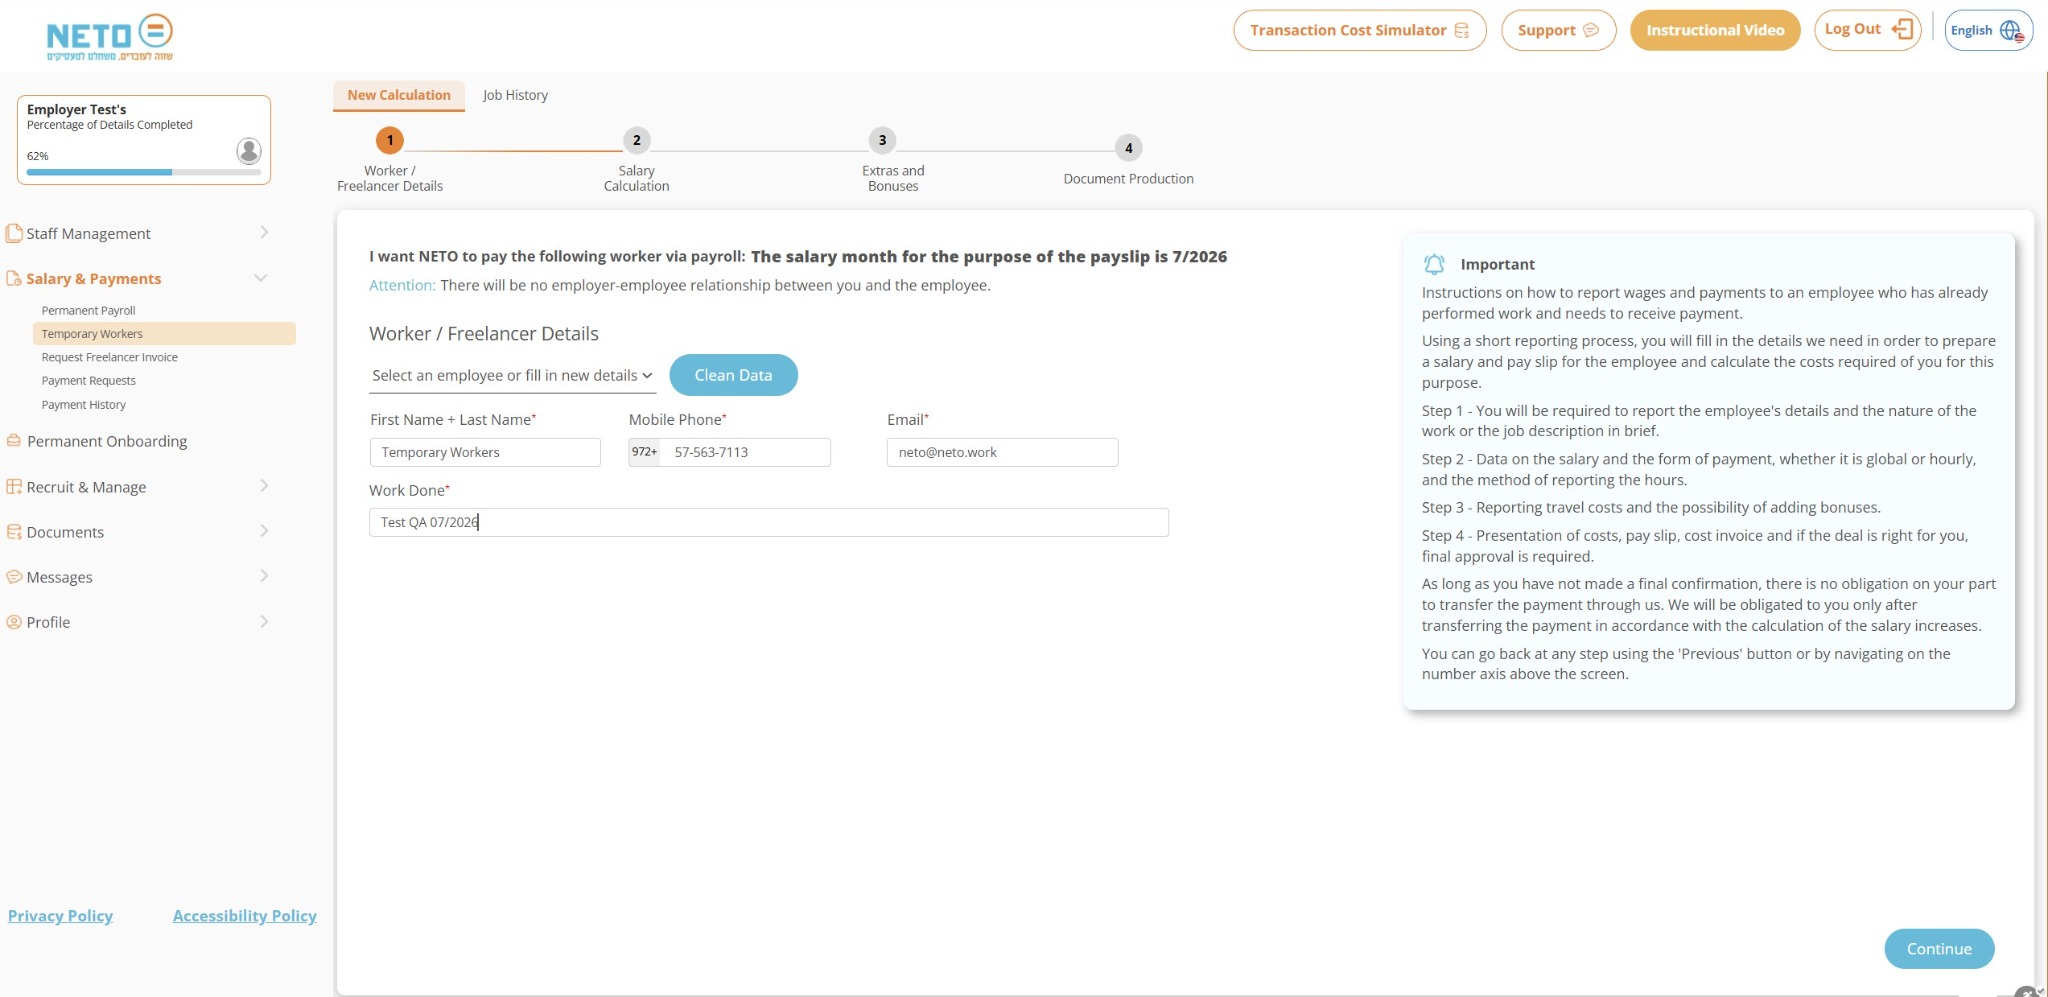
Important: These details are used to send the invitation and continue the worker’s registration process.
Enter the worker or freelancer details
10
Step 10 of 11

Send the invitation to the worker

After completing the work details and amount, the system sends the worker a message with a personal link.
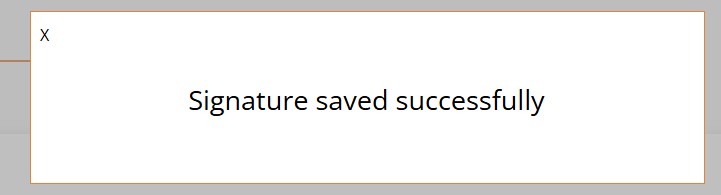
Important: From this point, the worker completes registration, Form 101, bank details and the required approvals.
Send the invitation to the worker
11
Step 11 of 11

Payment invoice and tracking

After approval, a payment invoice is issued with transfer details. The request and payment status can be tracked in the system.

Important: After the payment is received and the worker’s documents are complete, NETO issues a payslip and transfers the salary.
Payment invoice and tracking

Employer FAQ

How much does the service cost an employer?
NETO's fee is 5% of the invoice amount before VAT. No setup fees and no commitment · you pay only when there is an actual payment.
Do I need to open a company or a tax-withholding file to hire through NETO?
No. NETO operates under manpower licence No. 1565 from the Ministry of Labor and acts as the worker's formal employer: it issues the payslip, withholds tax and handles social security and pension · without you opening a company or a withholding file.
What does the worker or freelancer do after receiving the invitation?
The worker receives a message with a personal link and completes registration through it: personal details, Form 101 and bank account details. Once done, the process continues automatically.
When does the worker get paid?
After your payment is received and the worker has completed the required documents, NETO issues a payslip and transfers the salary directly to the worker's bank account.
I'm stuck on one of the steps · who do I contact?
Support is available by phone at +972-8-9761874, on WhatsApp at +972-8-6228945, or through the contact form. You can also ask the on-site assistant.

Summary · the whole process in five lines

  1. Register as an employer on NETO.LIVE and verify your details.
  2. Fill in your business details · once.
  3. Choose a track: permanent employee, temporary worker or freelancer invoice.
  4. Enter the worker's details and send the invitation · they complete registration via a personal link.
  5. Pay the invoice · NETO issues the payslip and transfers the salary.

Still have a question? We're here

The NETO team answers fast · on WhatsApp, by phone or through the contact form.

About the author
Yizhar CohenYC
Yizhar CohenEntrepreneur · CEO and Founding Partner at NETO

I founded NETO to turn complex employment and payment processes into something simple, clear and legal for everyone. Good service starts with human understanding, combined with smart technology and personal attention.

Connect on LinkedIn
Have a question? Let's talk.
Topics